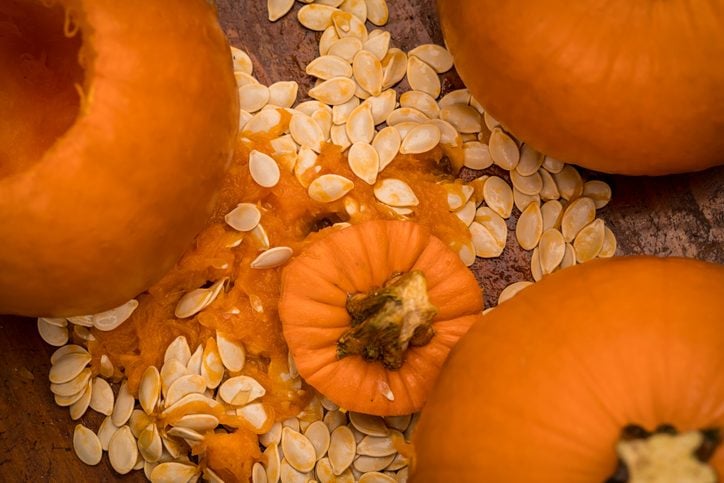
When darkness falls on Halloween, jack-o-lanterns light the way to your door. From sinister, jagged grins to painted-face masterpieces, they’re a Halloween tradition as old as the holiday itself.
Did you already pick a great pumpkin? Are you ready to start carving? And what will you do with the gloopy, slimy pumpkin guts once you scoop them out?
Stringy pumpkin innards do a number on your plumbing. So we asked Courtney Harmon — a mom, pumpkin carving expert and president of bluefrog Plumbing + Drain — to give us the scoop (sorry!) on keeping your drains fright-free this Halloween.
Where To Carve Your Pumpkin
Jack-o-lanterns may be fancier than ever — three triangles and a toothy grin seems downright quaint nowadays — but the age-old problem remains: Finding a place to carve your pumpkins without making a huge mess.
The sink seems logical, right? Wrong. Because no matter how hard you try, Harmon says some of those guts will end up down the drain, sticking like glue or wrapping around your garbage disposal. Hello, clog.
Try these locations instead:
- Outside: “If possible, carve your pumpkins outdoors,” Harmon says. Your kitchen or laundry room will stay nice and clean, and you can avoid the sink altogether.
- On newspaper: Inside or out, placing newspaper or plastic sheeting on your carving surface makes it easy to pick up the entire gross pile of guts and dump it right into the trash or compost bin.
- Inside a container: If you have a big plastic tub or one of those flat, under-the-bed storage bins, carve the pumpkin in that. When you’re done, it’s easy to pour out the innards and hose out the tub.
- In a large contractor trash bag: Just pull it up over the mess when done.
What To Do With Pumpkin Guts
You’ve staked out your pumpkin-carving location, and you’re ready to start hacking away. Now what?
First, decide if you want to keep the seeds or any of the pulp or flesh. If so, “designate a guts bowl,” Harmon says. As you scoop, pile them into the bowl. This little step will keep your workplace cleaner and contain any seeds or pulp you plan to reuse.
The first rule of pumpkin carving? “Do not dispose of pumpkin guts down the sink or toilet,” Harmon says, “as they can lead to clogs and other plumbing issues.”
To avoid this scary Halloween situation, Harmon suggests these less frightful options.
- Compost it: Every part of a pumpkin can be composted, as long as you didn’t paint it or coat it with something to deter animals. (Next year, consider using non-toxic vegetable paints.)
- Roast the seeds: Separate the pulp from the seeds, coat with oil and salt, and roast. Pumpkin seeds, also called pepitas, are delicious in salads and soups, or by the handful.
- Pumpkin purée: If you have big chunks of pumpkin flesh from yummy sugar or pie pumpkins, cook them up to make a delicious edible treat. Puréed pumpkin (minus seeds and pulp) can be used in soups, pies and breads.
- Wildlife food: Animals love pumpkins. If you live out in the country, consider offering the guts (and after Halloween, the whole jack-o-lantern) to local wildlife. Be careful not to attract unwanted pests, especially if you live in the city.
- Pumpkin facial: “Believe it or not, pumpkins are full of enzymes and antioxidants that can be great for your skin,” Harmon says. Puree the guts (minus seeds) and apply to your face for 20 minutes. Check a small area first for any allergic reaction.
How To Unclog a Pumpkin-Filled Drain
Plumbers deal with pipe problems year-round, but Halloween brings a lot more tricks than treats.
If you find yourself with a spooky plumbing disaster this year, Harmon says to try plumber-approved home remedies first. If you’re really facing a ghoulish situation, call in the pros to get you back to a fright-free flush every time.
Plunge it
Harmon says professional plumbers start with this, too. “A plunger can create suction that helps to dislodge minor clogs,” Harmon says. “It’s most effective for blockages close to the drain opening, like in toilets or sinks.”
Natural solutions
If plunging doesn’t work, try baking soda and vinegar. “Before moving on to chemical solutions,” Harmon says, “many plumbers recommend trying a mixture of baking soda followed by vinegar.”
After a few minutes, flush with hot water. “This can help break down organic material causing a blockage,” Harmon says.
Chemical drain cleaners
You know the ones — Drano and Liquid-Plumbr. “[T]hese can dissolve clogs,” Harmon says, “but they come with caveats.”
Chemical drain cleaners corrode older pipes, harm the environment and pose risks for plumbers who will be called out to help when they don’t work. Pro plumbers don’t use these, according to Harmon, so ask yourself if you really want to, either.
Drain snake or auger
“This is a long, flexible tool that can be manually turned to reach and dislodge clogs further down a pipe,” Harmon says.
Drain augers are a pro tool homeowners can use themselves, although plumbers usually have more powerful ones. “It’s more invasive than the previous methods,” Harmon says, “but can be quite effective for tougher blockages.”
Hydro-jets, cameras and pipe replacement
Plumbers pull out these big-dog tools when the other methods don’t work. Hydro-jets send a blast of high-pressure water down the pipe, while cameras help plumbers visualize a scary clog of unknown origin or location.
If the plumber determines your pipes are compromised by roots, foundation cave-in or repeated caustic drain cleaner use, Harmon says pipe replacement might be in your future. Now that’s scary!
Did you miss our previous article...
https://rsssuperfeeds.com/life-hacks/how-to-hang-holiday-decor-on-stucco-siding