Project Overview
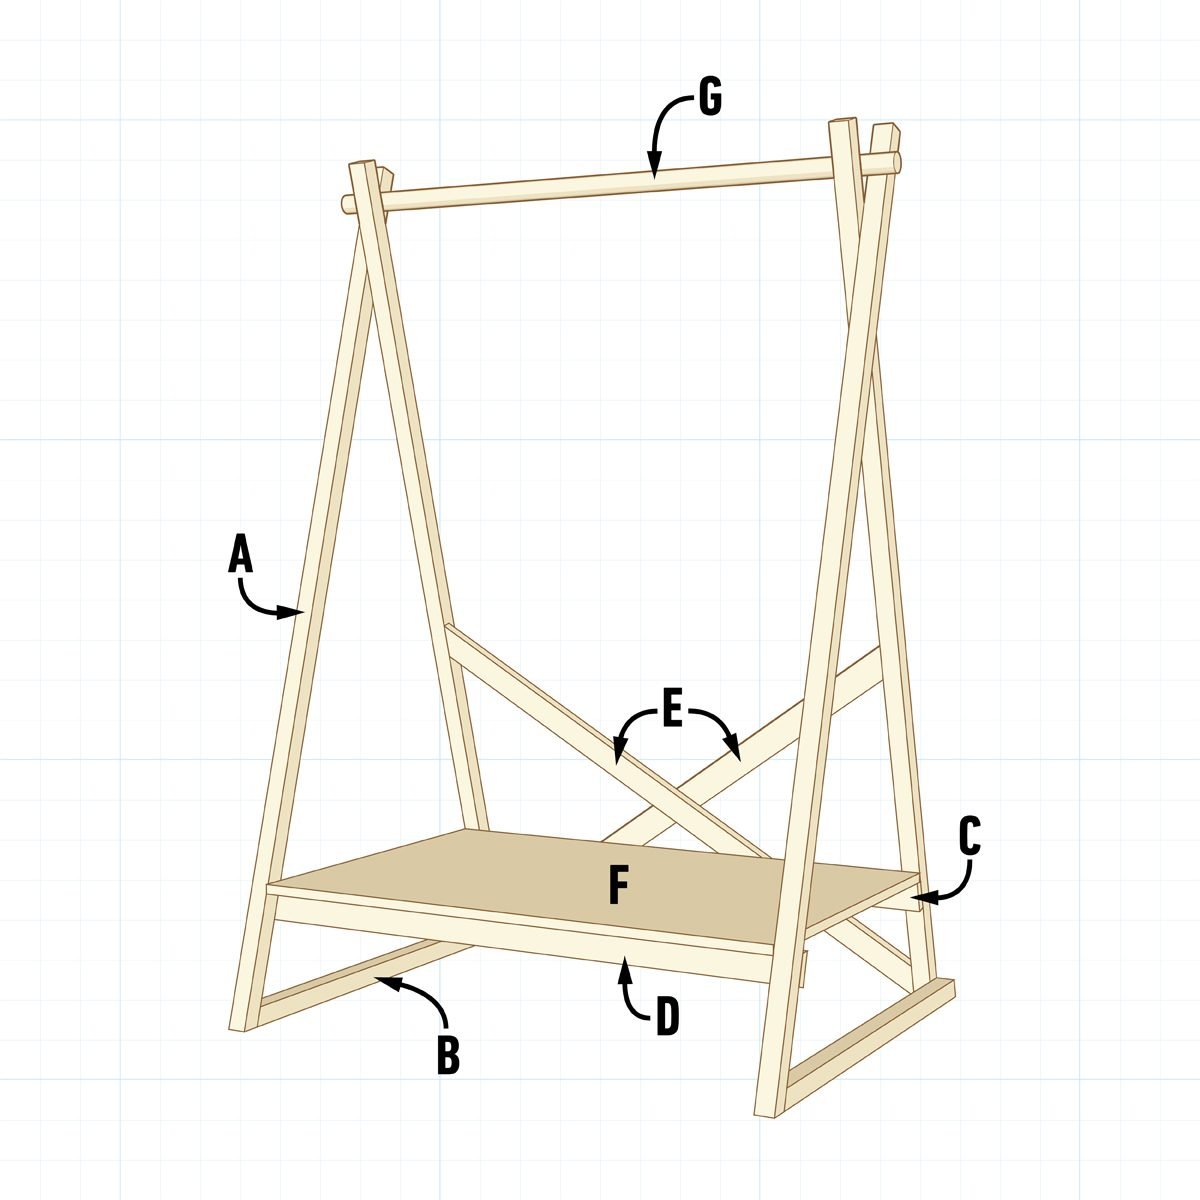
If you’re short on bedroom closet space or need someplace to hang your outerwear near the front door, here’s a great clothing rack you can build yourself. It’s practical and stylish, featuring a shelf to place your bags and a nook underneath to tuck away your shoes and boots. You can build this with basic tools and materials found at your local home center.
Cutting List
| KEY | QTY. | DIMENSIONS | PART |
| A | 4 | 1-1/2” x 1-1/2” x 70-3/4” | Vertical supports |
| B | 2 | 1-1/2” x 1-1/2” x 34-7/16” | Bottom braces |
| C | 1 | 3⁄4” x 2-1/2” x 43” | Back shelf support |
| D | 1 | 3⁄4” x 2-1/2” x 46” | Front shelf support |
| E | 2 | 3⁄4” x 2-1/2” x 48-13/16” | Cross Braces |
| F | 1 | 3⁄4” x 28-5/16” x 43” | Shelf |
| G | 1 | 1-1/2″-diameter x 48″ | Clothes rod |
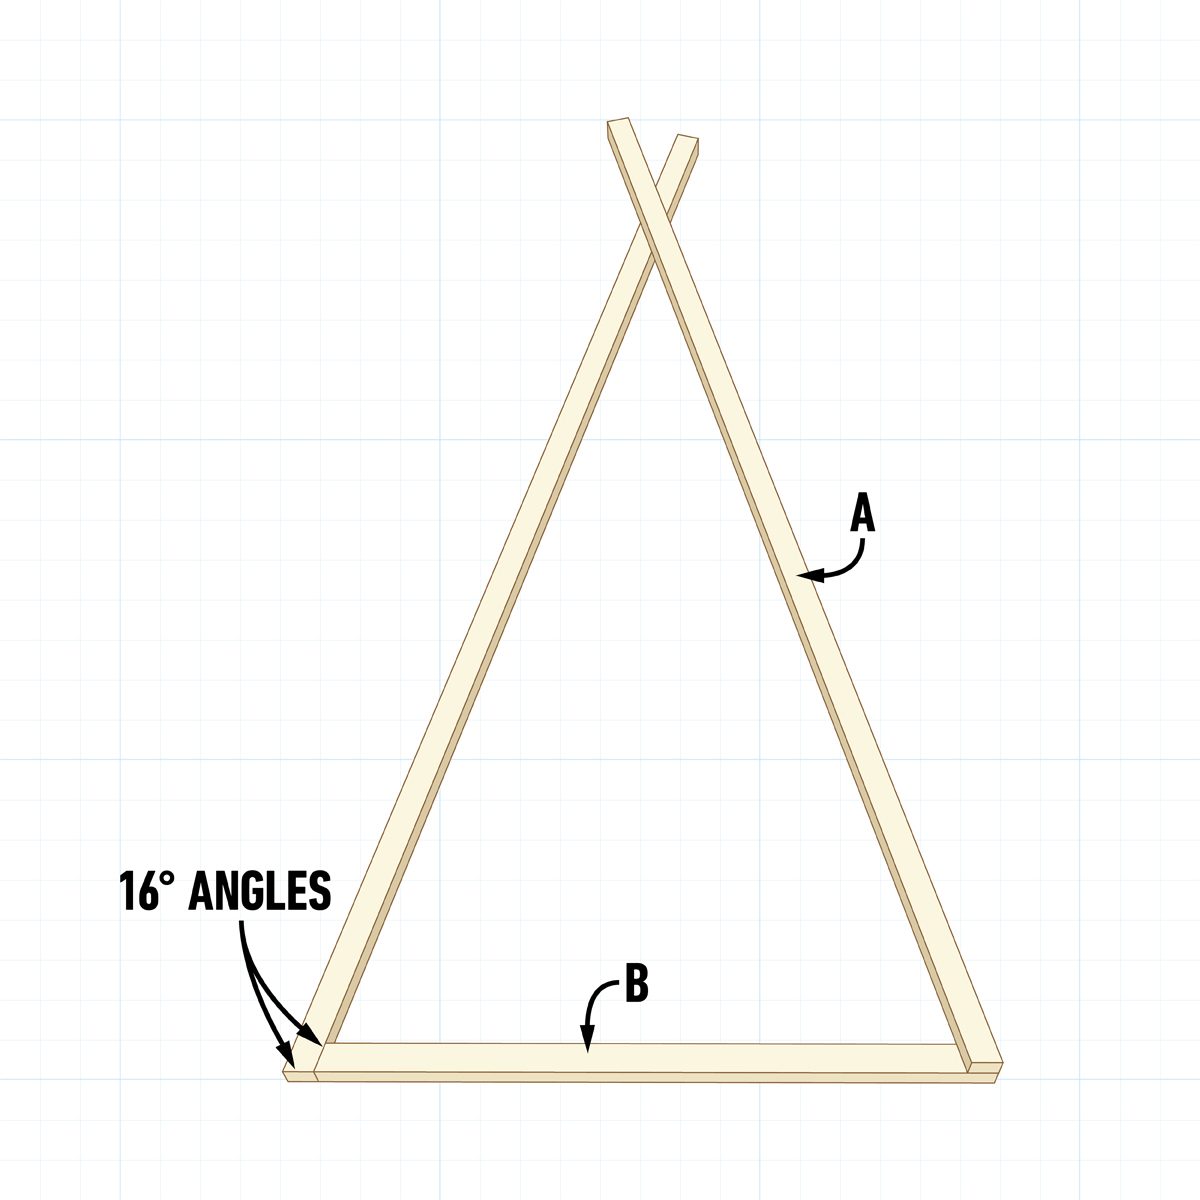
Fit the Base
Cut four 2×2’s to length with a 16-degree angle on one end. These are the vertical supports (A) that hold the hanger rod in position. For the bottom braces (B), cut two more 2×2’s with the same 16-degree angle on both ends.
Fit one vertical support to the bottom brace, then position the second vertical support on top and flush with the other end of the bottom brace. Fasten the parts together at the bottom with wood glue and trim screws.
Did you miss our previous article...
https://rsssuperfeeds.com/life-hacks/7-best-apartment-roach-killers