Trying to bring your own DIY bookmark ideas to life may seem like too much work, especially when you use any strip of paper or simply fold the corner of a page.
However, if you have a sense of style, hate ruining pages from your books, and hate the idea of paying $15 for a store-bought bookmark made of cardboard, then a DIY bookmark might be just what you need.
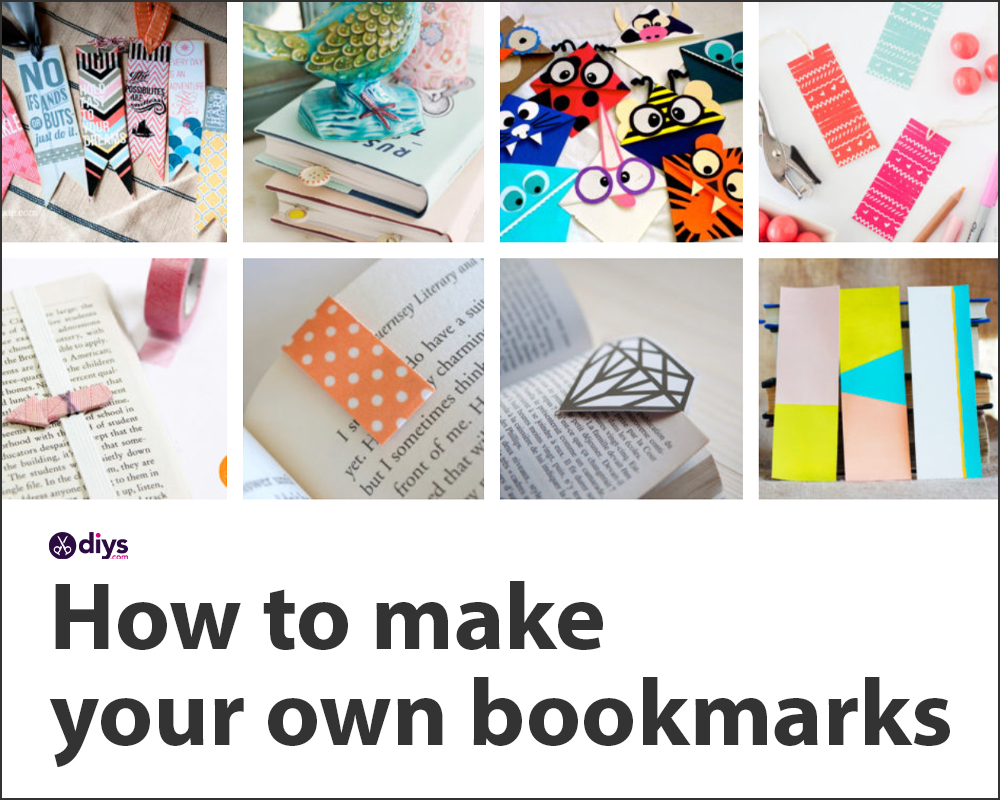
Like most DIY projects, creating homemade bookmarks is limited only by your imagination, and what better way to stimulate your imagination than with some inspiration?
Today’s article aims to provide inspiration for the best DIY bookmark ideas for beginners.
30 Best DIY Bookmark Ideas
Below you will find 30 different and unique DIY bookmark ideas, some simple and some more complicated, but all with tutorials so you can make them yourself.
1. DIY felt flower bookmark
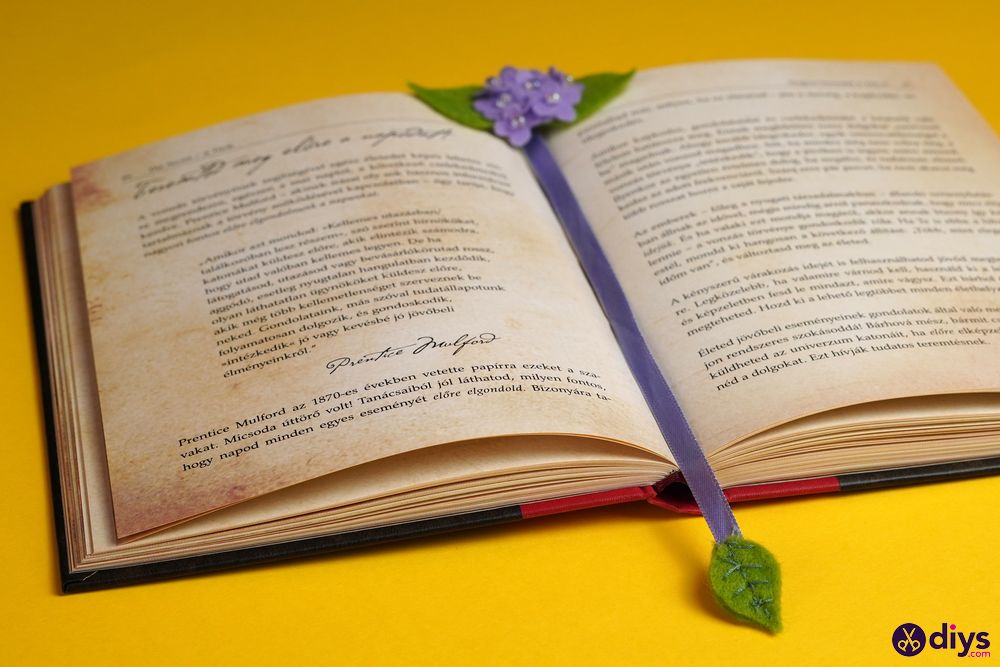
Our DIY felt flower bookmark takes the top spot on our list simply because of how cute it looks, especially when you look at the bottom leaf and see the detailed stitching that looks like leaf veins.
The overall design is easy to replicate, especially since our guide includes illustrations and video tutorials. However, you will need to know how to use a needle and thread to make that vein pattern.
You can make this DIY felt flower bookmark using felt and silk ribbon, and the floral motif is perfect for those that love adding a touch of nature to their bookmarks. Besides, since you’ll be making it out of fabric, it will also be durable.
2. Sequinned felt bird bookmark
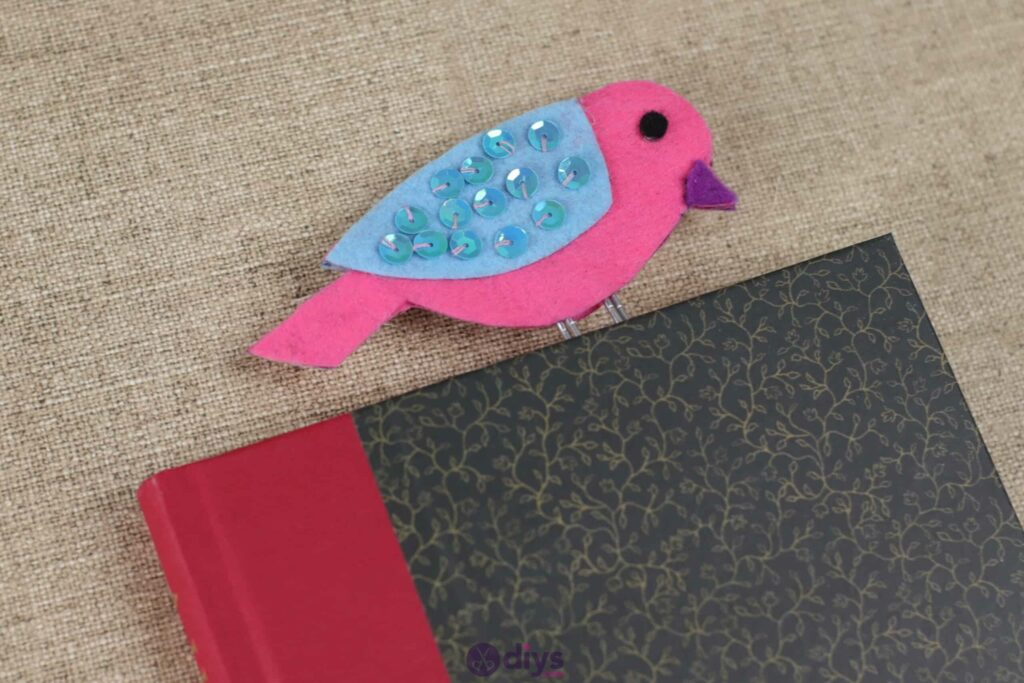
Our DIY sequinned felt bird is perfect if you’re more into ornithology than horticulture. Besides, thanks to all of those sequins, it also looks much more child-friendly, so if you want to coax your little ones into reading more, this might be a good design.
This DIY sequinned felt bird will require more work than the DIY felt flower bookmark mentioned earlier since you’ll have to sew lots and lots of sequins onto the felt.
However, this design is much more versatile since you can use all kinds of colored felt to make exotic bird bookmarks, such as a parrot or peacock-shaped ones.
3. DIY popsicle stick flower bookmark
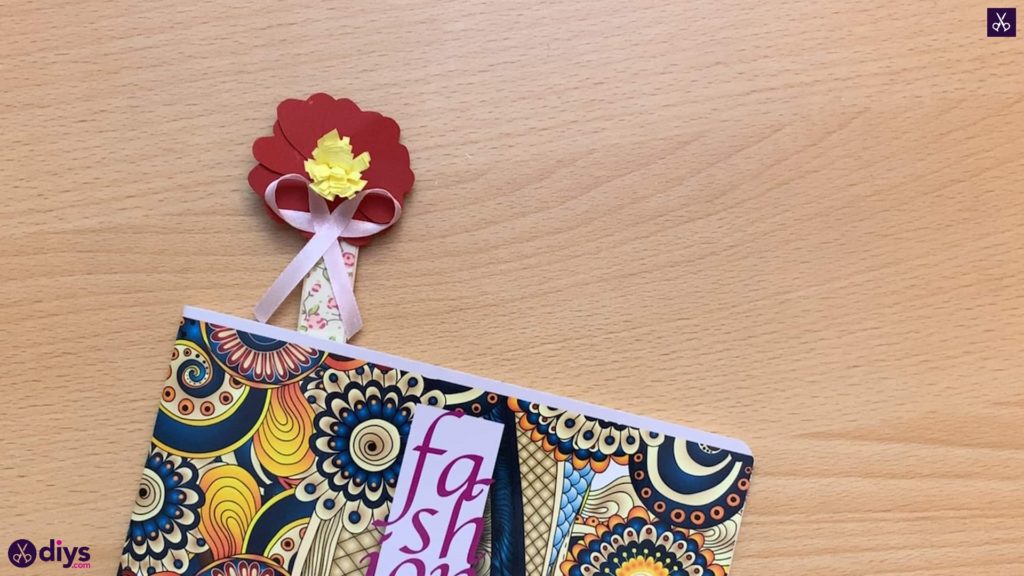
This DIY popsicle stick flower bookmark is good if you’re looking for something a bit more rigid than felt. You’ll need popsicle sticks to make the body of the bookmark (among other materials), which will make it a bit more durable. You’ll then cover the popsicle stick in a body of cardboard, colored paper, and ribbons for decorations, giving it a nice floral design.
Our favorite part of this design is that we’ll be repurposing popsicle sticks instead of throwing them away and contributing to the growing problem of wasting wood.
4. DIY scratch-and-sniff bookmarks
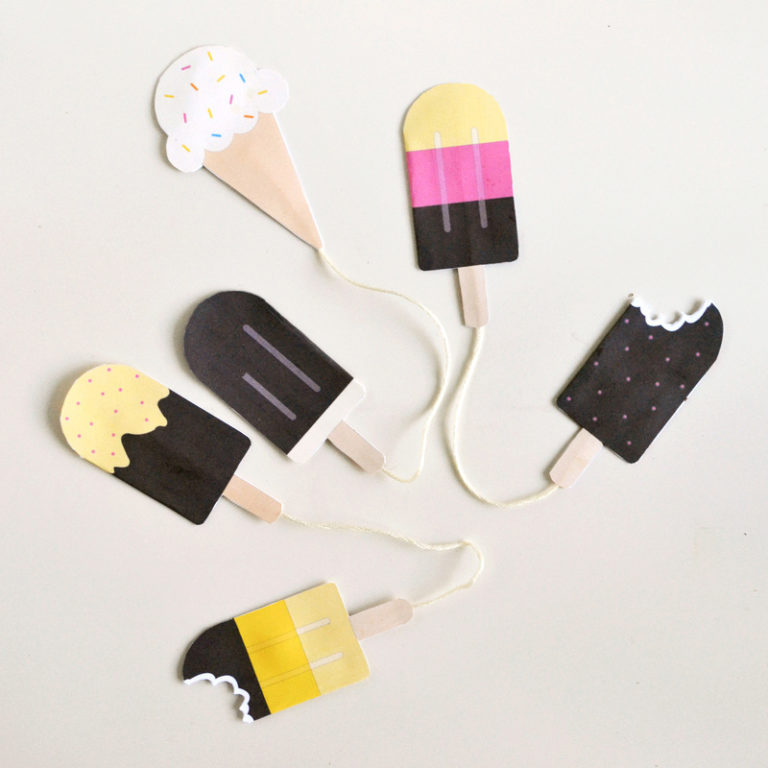
Our DIY scratch-and-sniff bookmark is like one of those promo catalogs for cosmetics that let you sample the fragrance by scratching a certain area, except that it smells like desserts.
The secret ingredient in making this bookmark smell so good is using some flavored instead pudding, kool-aid gelatin, or powdered cake mix. However, we don’t recommend that you try crafting the DIY scratch-and-sniff bookmark with your kids since you’ll have to mix all those flavorings with liquid craft glue, which can be pretty toxic.
As for the templates, you can go ahead and use our downloadable PDF or come up with your designs.
5. DIY polar Bear corner bookmark
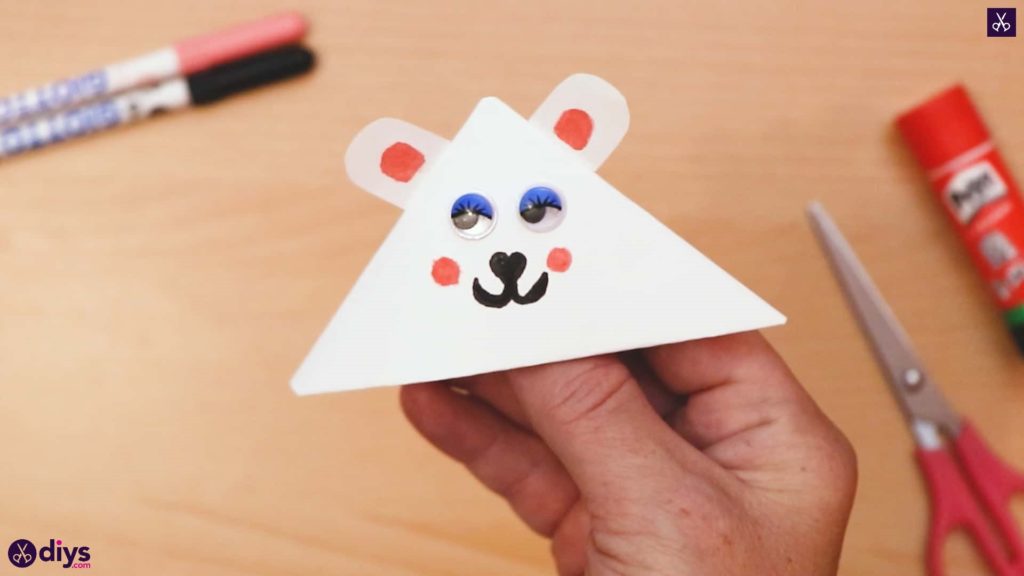
This DIY polar bear corner bookmark is just a corner bookmark that looks like a cartoonish bear.
Unlike typical bookmarks, you have to slide between the pages, all you have to do is place the DIY polar bear corner bookmark on top of the page you want to mark, and that’s it.
All you’ll need is some white paper, a glue stick, a pair of scissors, some googly eyes, and some markers, and you can follow our full guide, complete with both illustrations and a video tutorial, to see how you can do it too.
6. DIY heart corner bookmark
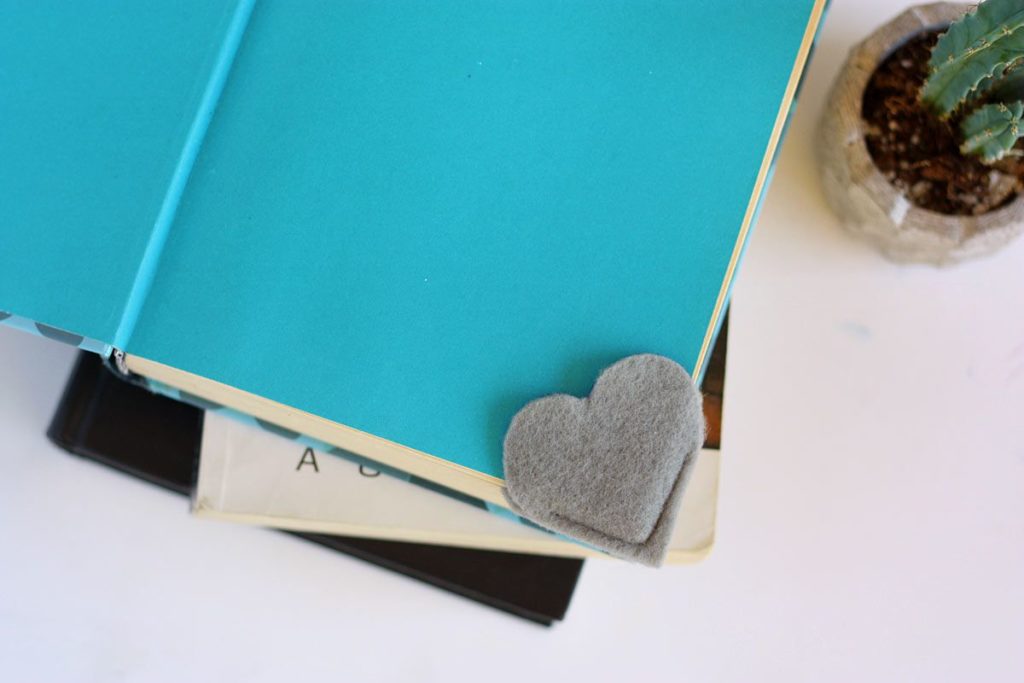
A DIY heart corner bookmark can bring out the romantic in anyone, and it’s a great way to show your significant other how much you care.
This DIY heart bookmark features a heart-shaped bookmark made of red felt. All you need to do is partially stitch two heart-shaped pieces of felt back-to-back, and you’re done.
It’s a great Valentine’s Day craft, or you can craft it for yourself and use it on your favorite romance novel.
7. Monster corner bookmarks
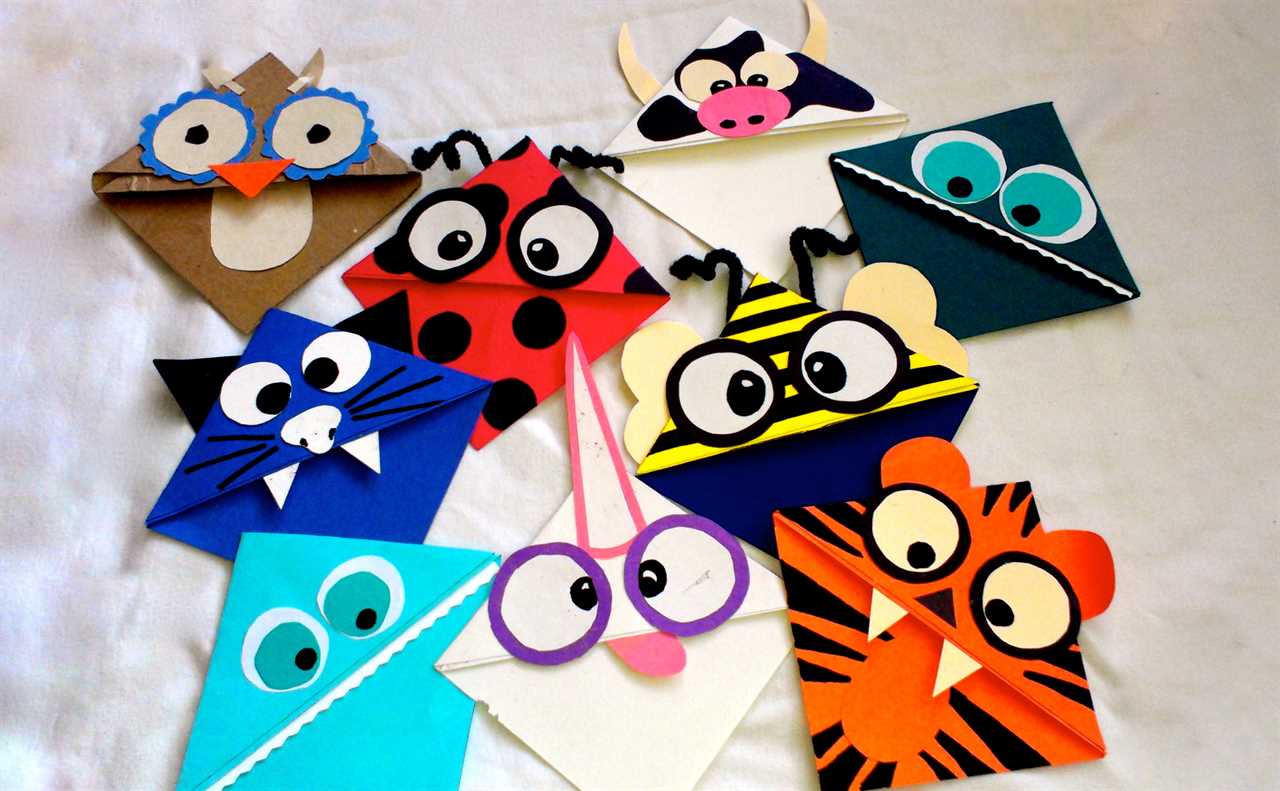
These monster corner bookmarks are a good alternative to the DIY polar bear corner bookmark mentioned above, especially if you want to try something a bit wackier.
The idea belongs to Youth Are Awesome, and they’ll teach you how to make these adorable (yet still slightly spooky) bookmarks step by step.
You’ll need typical supplies like colored paper, glue, and scissors. Still, you’ll also need other decorative elements, depending on what shape you want your corner bookmark to take (e.g., more googly eyes, feathers, pipe cleaners for antennas, etc.)
8. Cheese corner bookmark
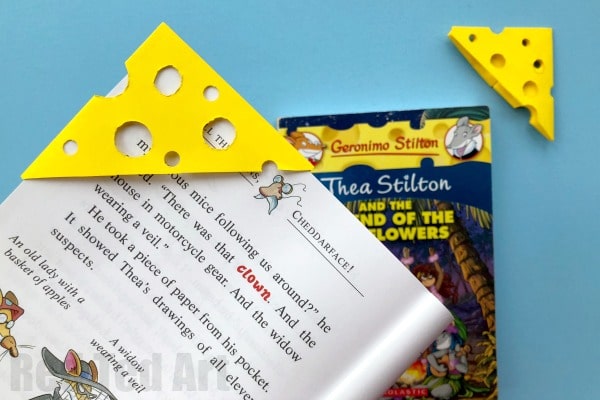
The cheese corner bookmark is another quirky take on the corner bookmark design, and it’s brought to you by none other than Red Ted Art.
It’s a lot simple to craft than our other corner bookmarks simply because it’s nothing more than a piece of yellow paper that you fold and then punch a few holes into to create the “cheese.”
It’s a great bookmark that anyone can craft in mere minutes, and you can use it on your favorite cookbook or even on a book about fine cheeses.
9. Heart-shaped paper clips
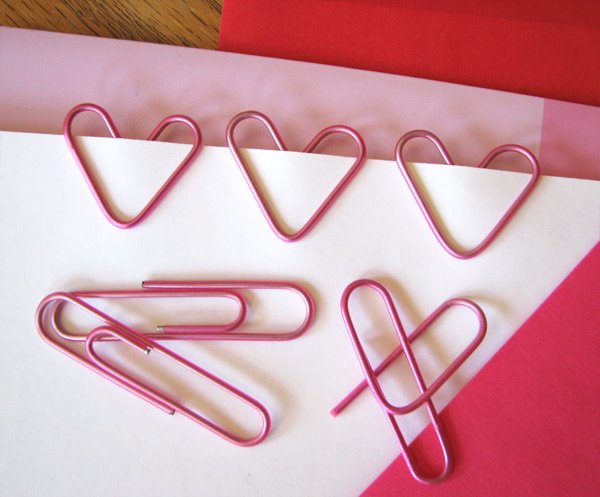
These heart-shaped paper clips are for those of you that are short on time and supplies but still want to show your loved ones how much you care. All you need is some pink paperclips which you’ll bend a certain way until they look like little pink hearts.
The hardest part about this design is finding pink paperclips, but given how big retailers and online stores are, that shouldn’t be much of a problem. If you can’t find any, you can always wear regular silver ones and paint them pink with nail polish.
To learn more about this simple yet effective idea, check out the full tutorial at How About Orange.
10. DIY button-tipped bookmarks
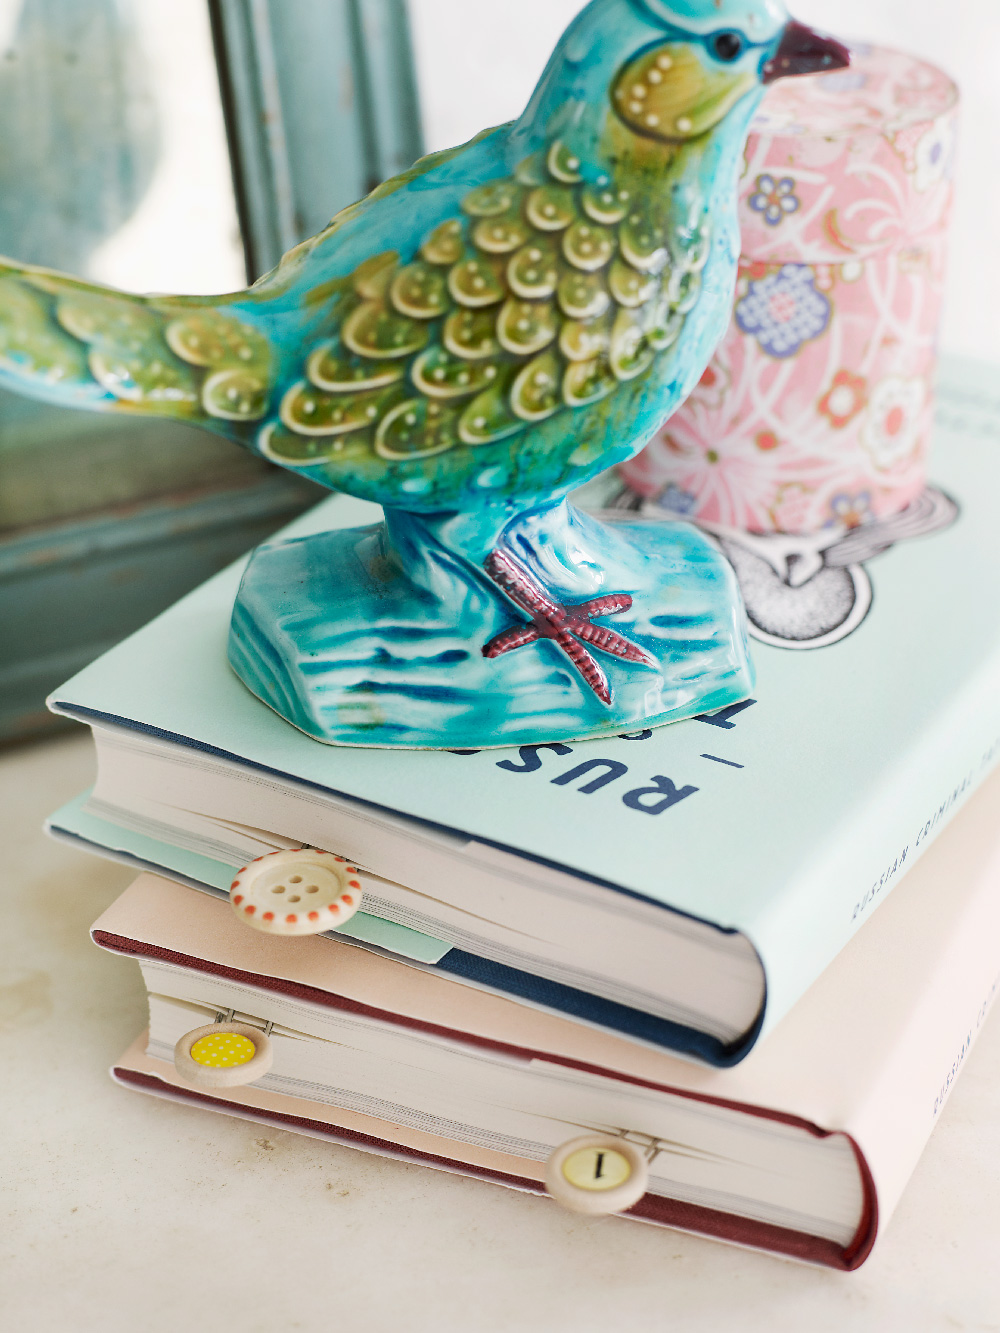
These DIY button-tipped bookmarks are simple, just like the heart-shaped paperclips mentioned above, except they have a button attached to one end to make them easier to see when attached to a book. The bigger and more colorful the buttons are, the better these DIY button-tipped bookmarks will turn out, and since you can find thousands of button designs, you’re spoiled for choice.
The tutorial is brought to you by Pottery Barn, and all you need are some paper clips, buttons, glue, and a bit of wire (optional).
11. DIY quoted bookmark
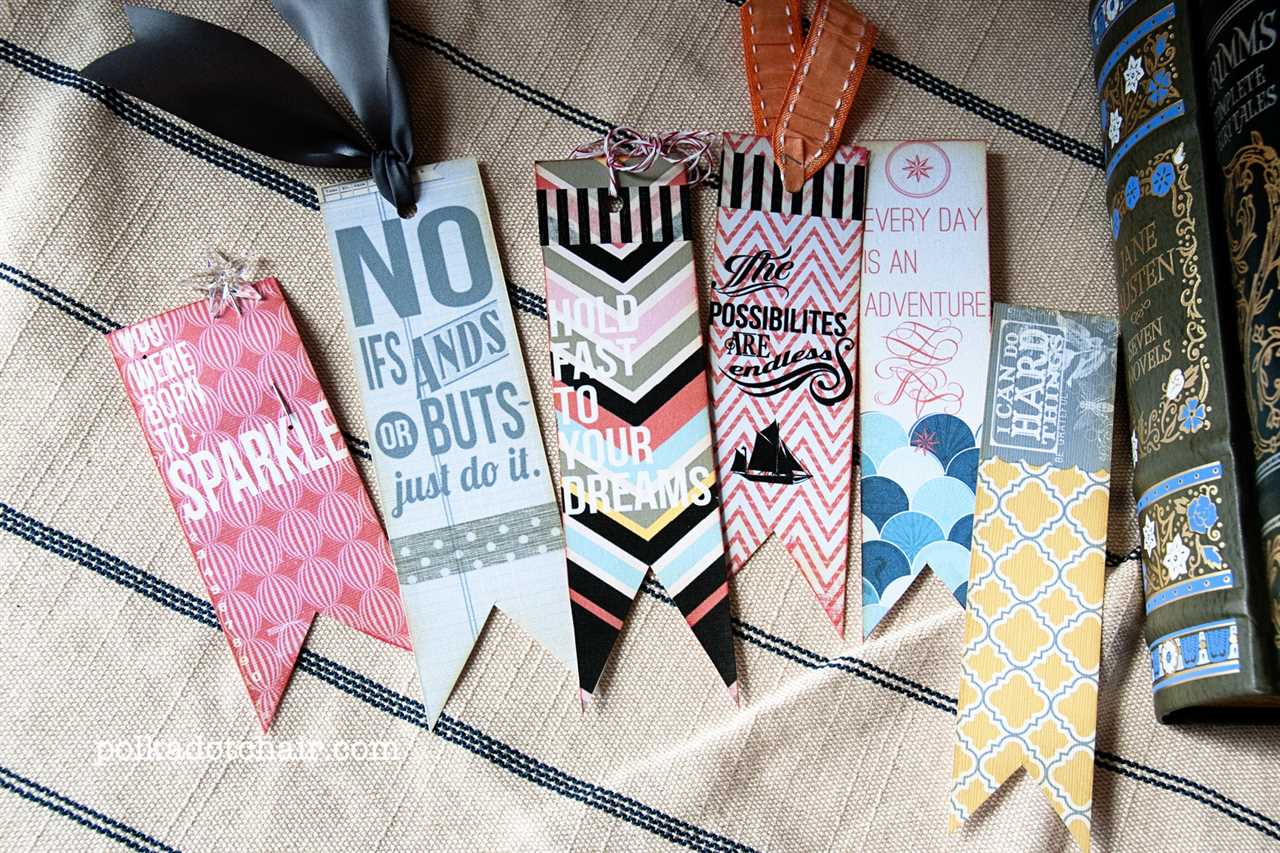
DIY quoted bookmarks are one of the ways to make people know your life motto, and they make for some great conversation starters.
This particular design comes from Polka Dot Chair. Unlike some of our other entries, where most decorative elements are sewn, glued, or taped on, these designs from The Polka Dot Chair use digital drawing to create the details, which you’ll then print on cardstock.
Those skilled in Photoshop or any other digital drawing software will have a blast with this one, as you can let your creativity run wild.
12. Simple printable bookmarks
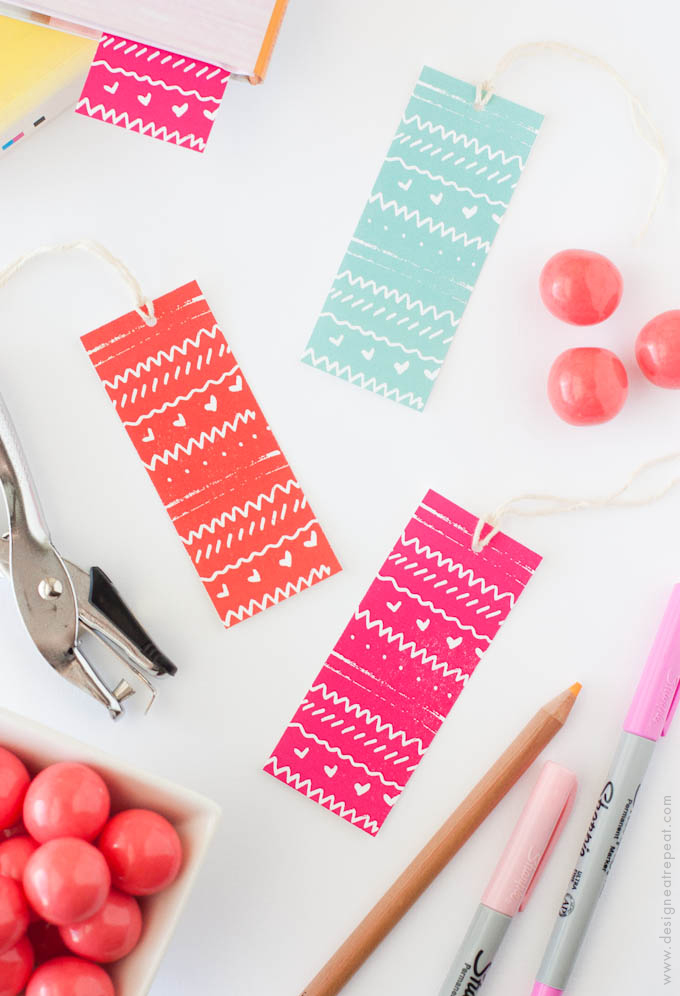
Simple printable bookmarks should be the go-to idea for anyone who doesn’t have the time or the patience to make something from scratch. All you need is a printer and some nice paper, and you can have some fairly decent-looking bookmarks in no time.
Design Eat Repeat has some great printable bookmark design templates which you can use as is or modified to better suit your taste, and they even come with instructions on how to make them if you need some help.
Alternatively, you can make your geometric patterns with free tools that you may already have on your PC, such as Paint for Windows or Paintbrush for MacOS.
13. Hand-drawn bookmarks
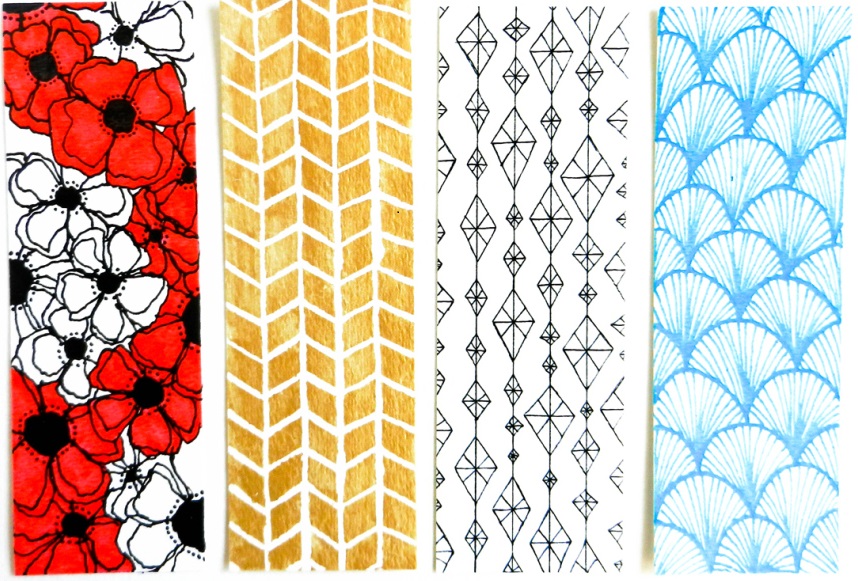
Hand-drawn bookmarks may be harder to make and not look as flawless as digital drawings, but they have that personal touch that people will appreciate.
Whether you’re a gifted artist or someone who just likes to doodle in the margins, these bookmarks from The Postman’s Knock are the perfect way to show off your skills.
You’ll need cardstock, some printable gift labels that you can download from the website, and some pens and colors to create your unique designs.
14. DIY color block bookmarks
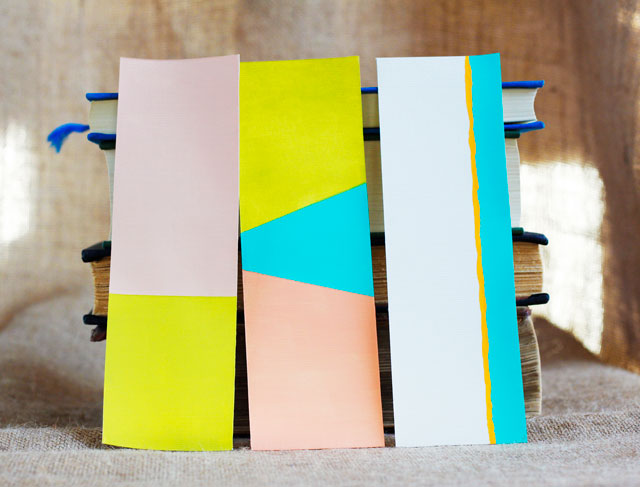
These DIY color block bookmarks look exactly like pieces of post-modern art, and they’ll add a touch of class to any book.
Jade & Fern has a great tutorial on making these bookmarks, and while they require some cutting and gluing, the result is worth it.
The most important supplies you’ll need here (besides the cardstock and colors) are your ruler, a sharp knife, and a cutting mat to ensure you get nice, clean cuts when making the bookmarks.
15. DIY leather color block bookmarks
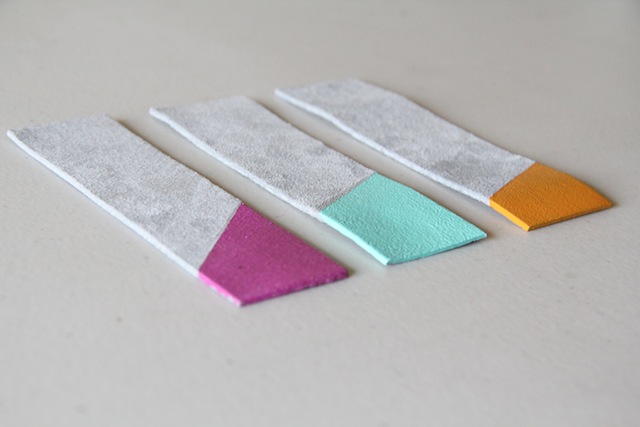
Like our previous entry, these DIY leather color block bookmarks use minimalist designs with straight lines and solid colors to give them that post-modern look.
However, what sets these bookmarks apart is the material they’re made from. While most bookmarks are made from paper or cardstock, they use leather, giving them a more luxurious look and feel. The tutorial comes from And We Play, and they’ll teach you everything you need to know about cutting, drawing, and dyeing leather.
16. Trapped dino DIY bookmarker
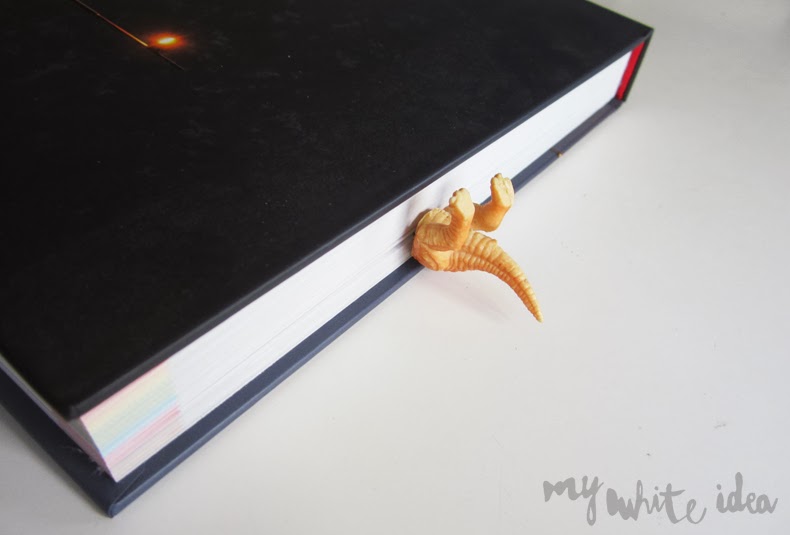
This trapped dino DIY bookmark from My White Idea looks like there’s a small dinosaur trapped under the book’s pages. To make the bookmark, all you need to do is cut the dino in half, attach a paperclip to its lower half, and that’s pretty much it.
Since kids love playful and comedic items, they’ll love them, and making a bookmark that’s also a toy is a great way to get them interested in reading.
The original article is in Spanish, but the instructions are all translated for English speakers, so you shouldn’t have trouble following them.
17. Amigurumi crochet rat bookmark
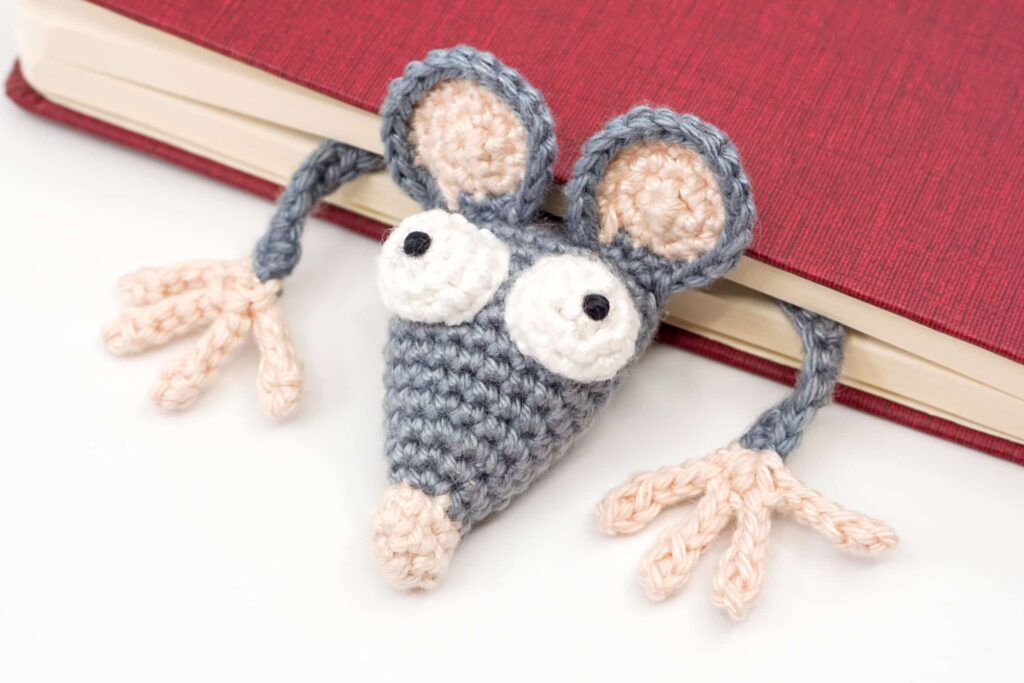
This amigurumi crochet rat bookmark is another fine example of a bookmark that looks like a trapped animal. However, you’ll make a crochet animal (called amigurumi) instead of a plastic toy from scratch.
We found this design at Supergurumi, and it comes with a detailed pattern and instructions on how to make the rat and assemble the bookmark itself. Although this project is somewhat more advanced, it’s still doable for anyone with basic crochet knowledge.
18. Simple Duct Tape Bookmark
a
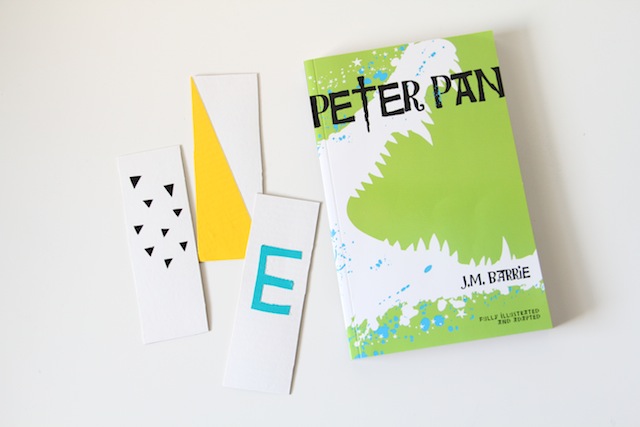
This simple duct tape bookmark proves that anything can become a bookmark with the right amount of imagination. With a few strips of duct tape, a cutting mat, and an exact knife, you can make a simple but effective bookmark like the ones featured on And We Play.
It makes for a great bookmark choice, especially if you want to make plenty of bookmarks in a short time since cardstock and duct tape are both easy to come by.
19. Ice cream stick wooden arrow bookmark
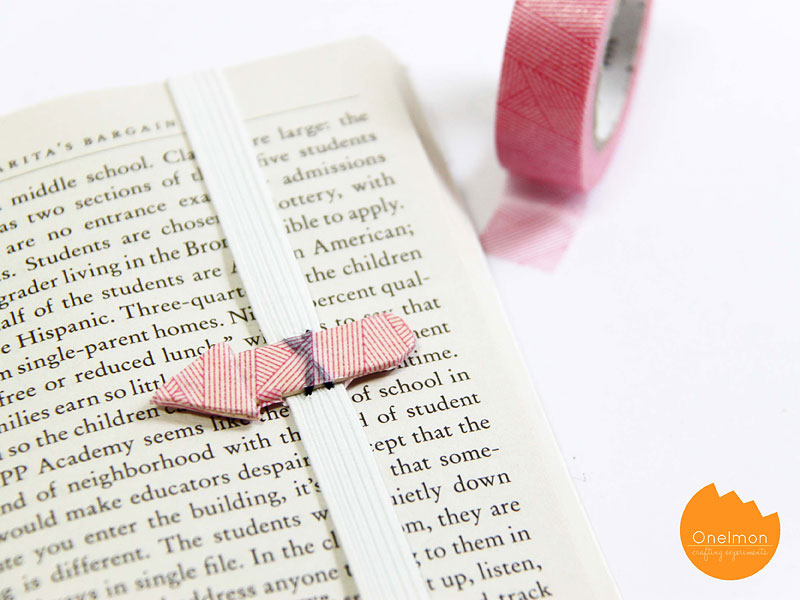
This ice cream stick wooden arrow bookmark from One Lemon is one of the cleverest designs on our list. The great thing about the design of this bookmark is that not only does it let you know which page you were on but also the exact word you last read, both horizontally and vertically.
Because of its practicality, we recommend this bookmark design for anyone who frequently experiences interruptions while reading and needs a fast way to get back on track.
20. DIY magnetic washi tape bookmark
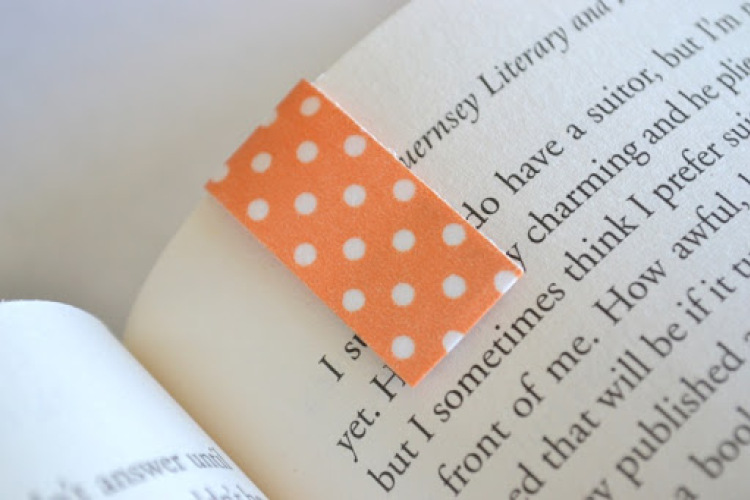
The DIY magnetic washi tape bookmark combines simplicity with functionality since it uses washi tape and soft magnets to make a bookmark that can be easily removed and repositioned. These bookmarks are perfect for those who need frequent reference points throughout a book and hate having to flip through pages to find your place again and again.
The original idea belongs to Lemon Squeezy Home, and they created a guide detailing every step of the bookmark-making process. Since you can find washi tape in all colors and patterns, there’s no limit to how you can customize this bookmark.
21. DIY teacup bookmarks
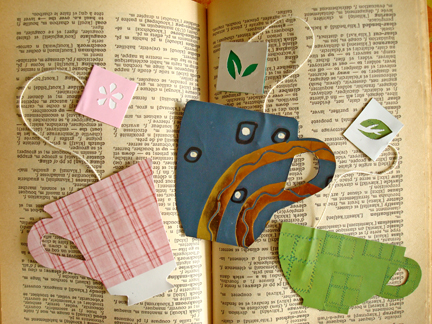
DIY teacup bookmarks are a great reminder that you should enjoy a good book next to a warm cup of tea. These DIY teacup bookmarks from Genuine Mudpie are easy to make and only require a few supplies, such as used gift bags, scissors, a sharpie, and other embellishments of your choice.
Not only that, but the folks at Genuine Mudpie also provide a printable template that you can use to make the process even easier.
22. DIY tassel bookmarks
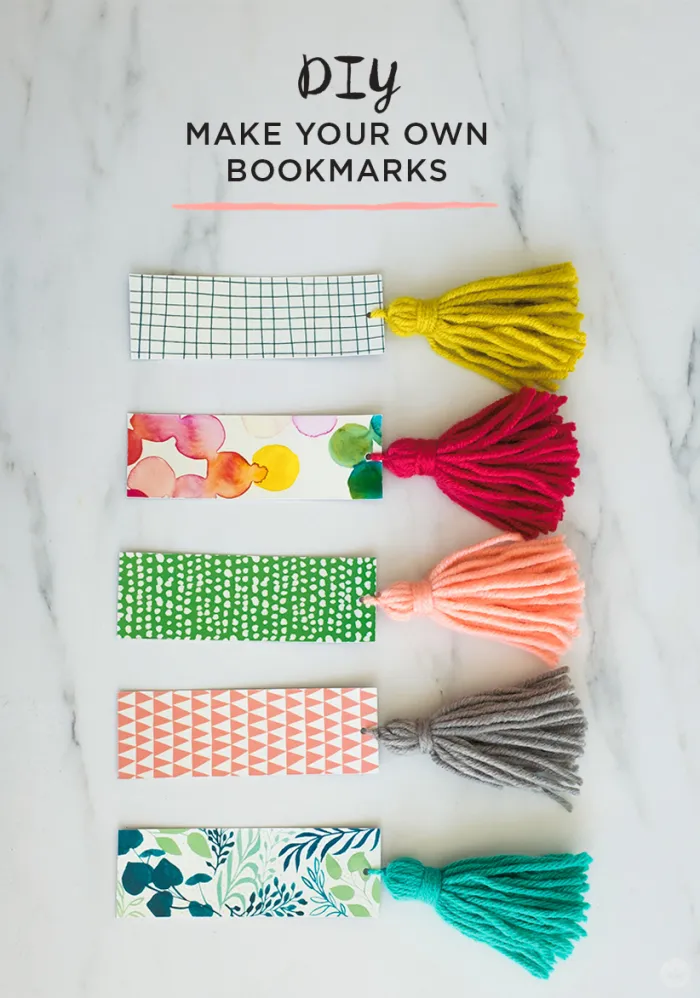
Few bookmarks are as cute as these DIY tassel bookmarks from Think.Make.Share.
These DIY tassel bookmarks are nothing more than simple cardstock bookmarks with various markings and designs drawn on them, but with big fluffy tassels attached to one end. This gives you something to fidget with, but it will be much easier to find the book you were reading when you have a brightly colored tassel hanging out of it.
23. Easy Harry Potter bookmarks
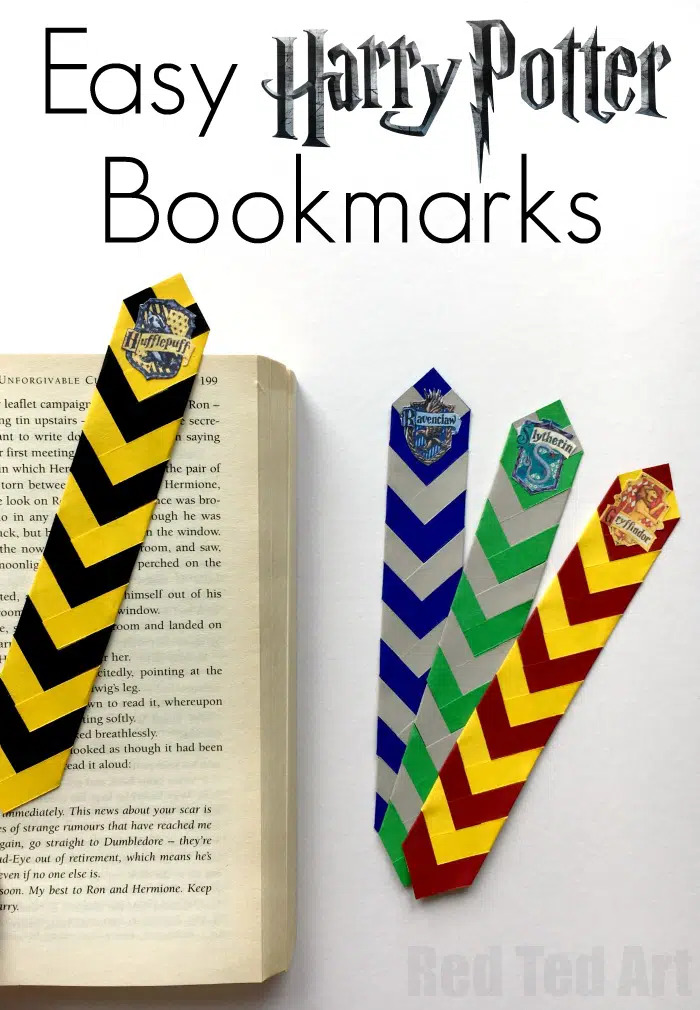
These four Harry Potter bookmarks were designed with the Hogwarts houses in mind. You’ll need colored paper to make them, and you’ll have to use the main colors of each house:
Green and grey for Slytherin, black and yellow for Hufflepuff, maroon and yellow for Gryffindor, and blue and grey for Ravenclaw. Besides, you’ll arrange the colors in a chevron pattern to make each bookmark pop.
These DIY corner bookmarks from Red Ted Art are a great way to use up those scraps of paper.
The folks at Red Ted Art have a great tutorial that walks you through each step of the bookmark-making process.
24. DIY shooting star bookmark
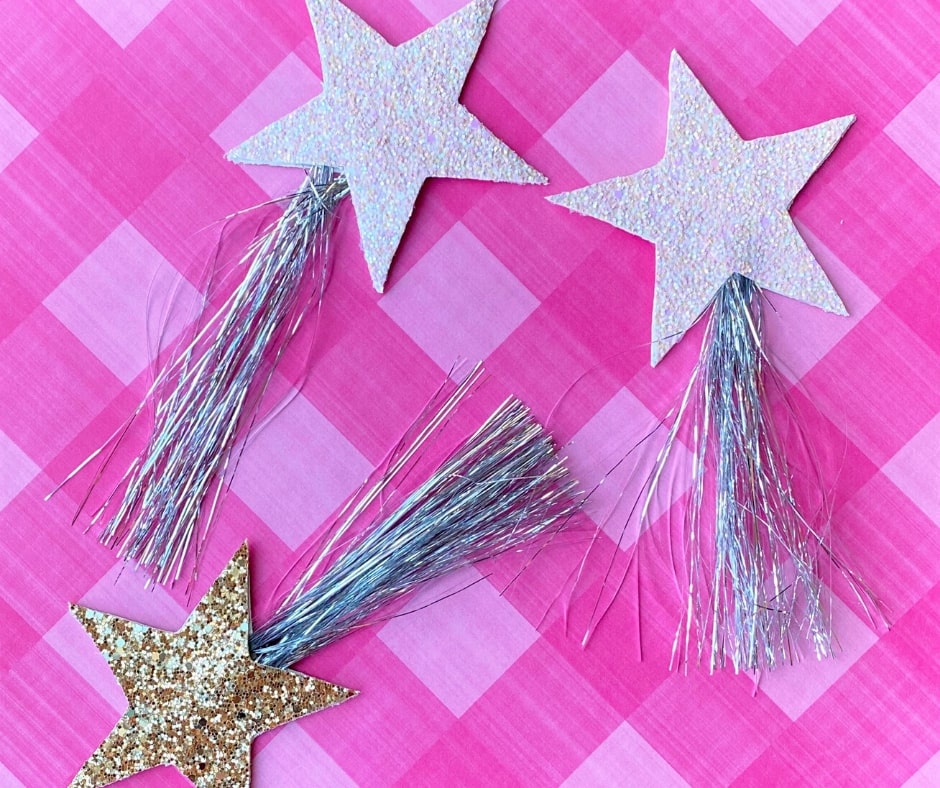
This DIY shooting star bookmark can best be described as glamorously geeky, and we owe it all to the creative minds at Lost Mom.
You’ll need glitter canvas sheets and some Christmas tree tinsel to obtain the signature shine. Sure, it may look like a Christmas tree topper, but it’ll make for an excellent bookmark.
Besides, you can use this idea and expand upon it by making other celestial objects, such as comets, half-moons, or even planets that are easier to recognize, such as Saturn.
25. DIY spine bookmarks
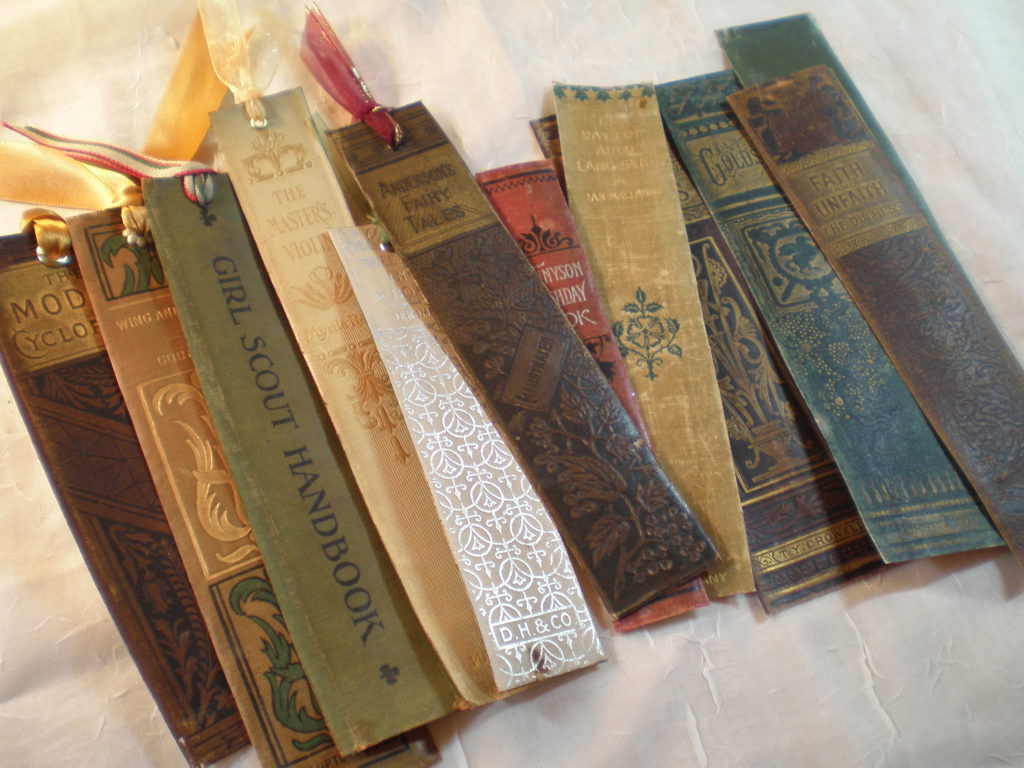
Made from the spines of old books, these DIY spine bookmarks from Books, Booze, and Beauty is the perfect way to give new life to books that you’re no longer reading or books that are too damaged to read anymore.
To make these bookmarks, you need a sharp knife, some strong glue, and a few old books that you don’t mind cutting up. Once you have your supplies gathered, simply follow the instructions in the tutorial.
26. DIY feather bookmarks
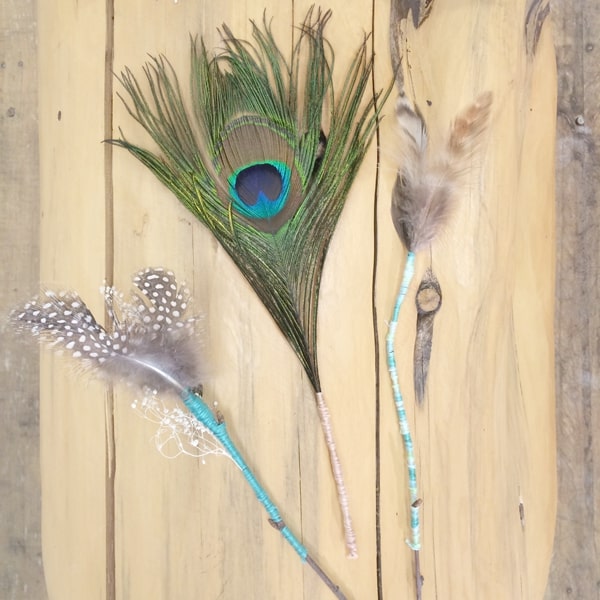
A DIY feather bookmark is a good way of letting people know you are connected to nature. The first thing you’ll need to make these bookmarks is twigs, feathers, baby’s breath, scissors, and yarn to make these bookmarks. The second thing you’ll need to do is to head over to Everyday Yoga for the complete tutorial.
Those who live around woods or open fields won’t have a problem finding feathers and twigs, but if you don’t have that luxury, you can always buy them online or in crafts stores.
27. DIY resin bookmarks
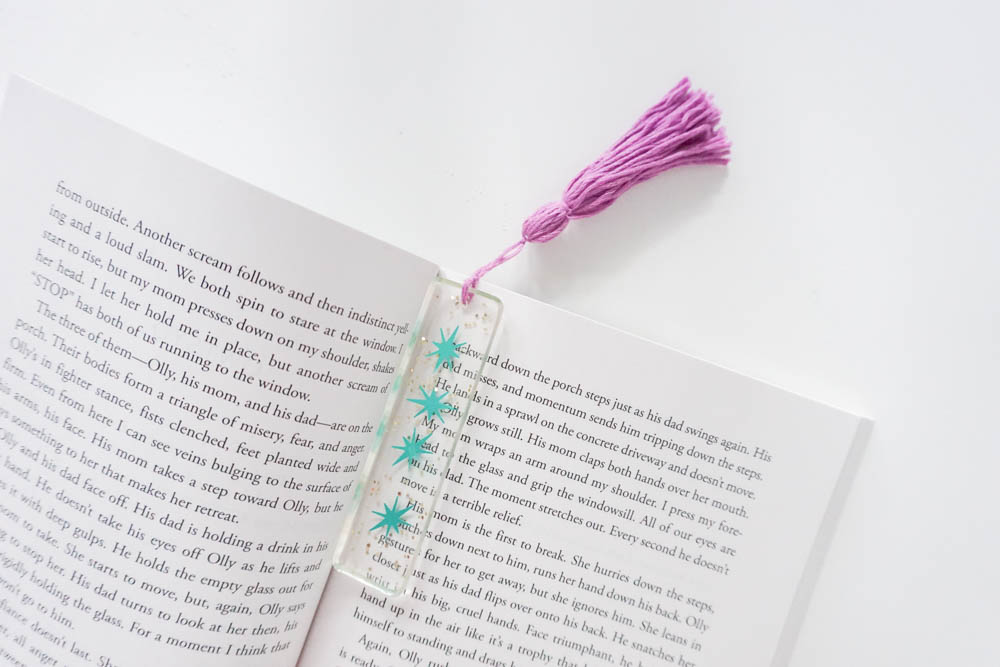
These DIY resin bookmarks use more modern crafting supplies than simple twigs and feathers, namely epoxy resin. Nowadays, it’s not only easy to find resin kits at your local arts and crafts store but also relatively cheap. If you’re passionate about working with resin, check out this tutorial from Resin Crafts.
On a scale from 1 to 10, these bookmarks are undoubtedly a 10 in beauty and durability, and they’re also the bookmarks that are probably the easiest to pass off as store-bought.
28. Beaded bookmark
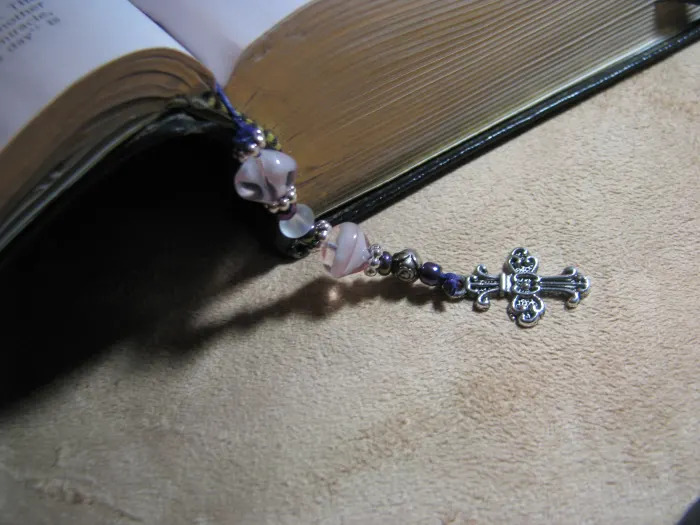
This beaded bookmark looks more like a piece of jewelry than an actual bookmark, and the truth is that this is intentional. The folks at Felt Magnet designed this bookmark as a gift for someone special, such as a close friend, family member, or even a significant other. Besides being a bookmark, it can also make for a fashionable keychain.
Crafting this bookmark is very similar to how you used to make beaded bracelets when you were younger, with the only difference being the size and type of beads used.
29. Confetti bookmarks for kids
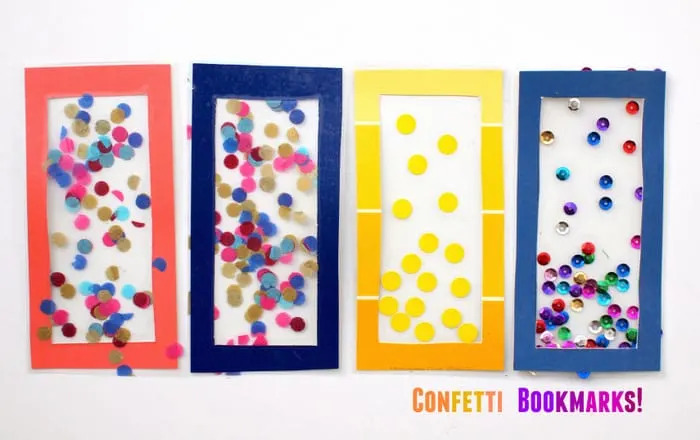
These confetti bookmarks from DIY Candy resemble simple toys for children. They look like small boxes with a transparent window in the front, and inside each box is a little bit of confetti that kids can use to make a wish. If confetti doesn’t sound glamorous enough, you can use sequin, beads, or glitter dust instead.
Although these bookmarks may seem too simple, they’re perfect for kids just starting to learn how to read.
30. DIY photo bookmark
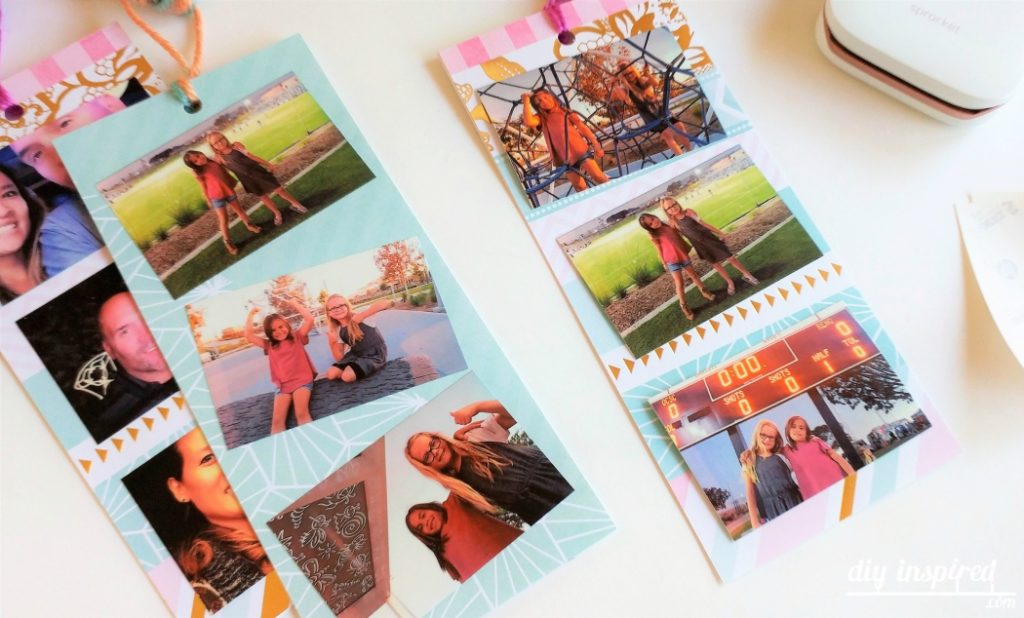
A DIY photo bookmark is the epitome of personalized gifts since you make them using photos of you and your loved ones sharing happy moments. To make these bookmarks, you need some photos, scrapbook paper, glue, scissors, and other everyday materials.
Head to DIY Inspired for the complete tutorial on making these DIY photo bookmarks.
The great thing about this project is that it’s extremely easy to make. You can use any photo you want, whether a Polaroid, a snapshot, or even a professional picture.
What Are the Best Materials for Making Bookmarks?
The best materials for making bookmarks are paper, cardstock, leather, and ribbon. However, you can use any type of material that you have on hand, including fabric, yarn, buttons, and even beads.
Here are some of the best materials that you should consider:
- Cardstock: This is the most common type of paper used for making bookmarks. It’s thick and durable, which makes it ideal for bookmarks. You can find cardstock at your local arts and crafts store or online.
- Velvet and satin: These are ideal materials for elegant bookmarks and might be appreciated by someone who enjoys historical and period-piece books.
- Recycled paper (e.g., old maps or sheet music): these add a rustic flair and have zero environmental impact.
- Leather: Leather is a great material for making bookmarks that double as keychains. It’s also perfect for those who want a rustic look.
- Felt: This material is easy to work with and can be used to make bookmarks of any shape or size. Besides, it’s perfect for kids’ projects.
- Sheet metal: This is a great material for making durable and long-lasting bookmarks. However, it’s also one of the more difficult materials to work with, and you’ll need specialized tools to do the cutting, engraving, or whatever design you have in mind.
- Thin plywood: These are sturdy materials for long-lasting bookmarks, but thin plywood requires additional skill and expensive power tools, like operating a CNC machine or a wood engraving machine.
One thing you must remember when choosing the right materials is that they need to be as thin as possible. If they’re too thick, they will make it difficult to close the book.
Not only that but make sure that your paints and dyes are high quality since you don’t want streaks or faded imprinting on your book pages.
Why Should I Make My Own Bookmarks?
There are plenty of reasons why making your bookmark is better than buying one from the store.
- Budget-friendly: It’s a lot cheaper to make your own. If you’re on a budget, you can use materials around the house, like paper, ribbon, and yarn.
- Customizable: Another reason is that you can personalize your bookmarks. You can choose the materials, colors, designs, and shapes.
- Sentimental value: Homemade bookmarks also make great gifts since they’re unique and full of meaning. They’re perfect for anniversaries, graduations, or any other special occasion.
- You can sell them for a profit: If you’re crafty, you can sell your bookmarks at local craft fairs or online. Just do some research to see what designs are popular and in demand.
- They can help promote your business: Since bookmarks serve a decorative and functional purpose, they offer a great way to promote your business. You can design them however you want and insert your company logo, slogan, or contact information.
Frequently Asked Questions
This next section of our guide will answer some of the most common questions people have about bookmarks.
How long should bookmarks be?
There is no definitive answer to this question, as the length of a bookmark will depend on the size of the book you’re using it in. However, a good rule of thumb is to ensure that your bookmark is at least 2-3 inches longer than the width of the book’s spine. This will ensure that your bookmark doesn’t fall out of the book while reading.
What else can I use a bookmark for?
If you notice that you’ve gathered quite a lot of bookmarks you’re not using, don’t worry, there are plenty of other ways to use them. For example, you can use them as gift tags, party invitations, commemorative gifts, or business cards with your contact information.
Closing Thoughts
We hope that this guide has given you some bookmark inspiration and that you’ll try out some of these DIY ideas.
Bookmarks are a simple and easy way to add a personal touch to your reading experience, so don’t be afraid to get creative with them. And if you need more bookmark ideas, check out our other guide on the best DIY bookmark gift ideas.
Happy reading!
The post 30 Different Ways to Create Your Own Bookmarks appeared first on DIYs.com.

